
Introduction#
After the 2.0 update, the Claude Code extension introduced mandatory login verification, preventing users from calling models through a local router without logging in.
This tutorial shows how to bypass that local login check and route the Claude extension through Claude Code Router (CCR) to any large-model service you choose.
Install the Claude extension and CLI tools#
First install Visual Studio Code. If needed, see the VS Code beginner guide: VS Code installation and configuration. Then open the Extensions panel in VS Code, search for Claude Code for Vs Code, and install it.
Bypass Claude login verification#
The extension only checks a local configuration file. We can create that file and make the extension think you are already logged in.
Create a file named config.json in:
- Windows:
%UserProfile%\.claude\ - macOS / Linux:
~/.claude/
Put any string in primaryApiKey, for example hello-claude. This field only passes the local status check. Restart VS Code after creating the file, and the extension should stop forcing login.
Install and configure Claude Code Router (CCR)#
CCR forwards Claude extension requests to your configured model service.
- Install CCR with npm.
- Run
ccr startonce to generate the default config file, then stop it withCtrl+C. - Open
%UserProfile%\.claude-code-router\config.jsonon Windows or~/.claude-code-router/config.jsonon macOS/Linux. - Fill the
APIKEYfield with a custom local key such assk-ant-local-ccr-1234567890. - Run
ccr ui, click Add service, and configure the large model and real API key you want to use.
If you are unsure how to configure OpenAI, Gemini, Qwen, or other providers, see Claude Code Router: connect five major models.
Point Claude to CCR#
Tell the Claude extension not to call the official API, but your local CCR service instead.
Step 1: configure VS Code extension environment variables#
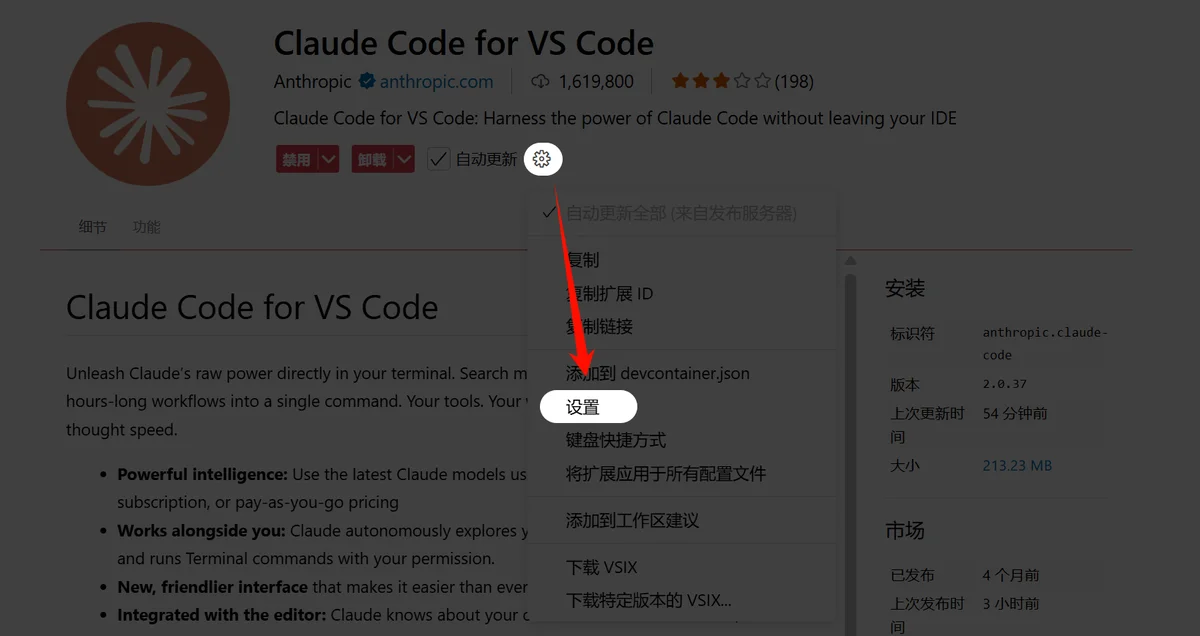
Open VS Code settings, find Claude Code: Environment Variables, edit settings.json, and add ANTHROPIC_BASE_URL and ANTHROPIC_API_KEY pointing to your local CCR service and local token.
Reload the VS Code window after saving.
Step 2: system-level environment variables#
On Windows, use administrator PowerShell and set ANTHROPIC_BASE_URL plus ANTHROPIC_AUTH_TOKEN with setx. Also set $env: values for the current terminal if you want immediate effect.
On macOS/Linux, append export ANTHROPIC_BASE_URL="http://[redacted-ip]:3456" and export ANTHROPIC_AUTH_TOKEN="sk-ant-local-ccr-1234567890" to your shell config, then source it.
Alternative: .claude/settings.json#
An older method is to set environment variables inside .claude/settings.json, but recent tests suggest it sometimes does not take effect after plugin updates. Keep it only as an archival fallback and prefer the two methods above.
Common issue: API ERROR#
Try the following order:
- Confirm environment variables and VS Code
settings.jsonboth point to CCR. - In the VS Code terminal, run
ccr codeand check whether CCR works. - Run
claudedirectly for a test. - Finally use the extension.
If this post helped, you can support Rosetears on Afdian.
Screenshots and media#

Preserved command, configuration, and prompt blocks#
| |
| |
| |
| |
| |
| |
| |
| |
| |
| |
| |