Notes#
- Install R first, then install RStudio.
- I recommend installing R and RStudio in the same directory. For example, create a folder named
Ron drive D: (D:\R). - Do not include Chinese characters or spaces in the installation path, as they may cause potential problems.
Downloading and Installing R and RTools#
Choose a CRAN mirror Visit the CRAN: Mirrors page and choose any mirror in the China region. I recommend Tsinghua University’s mirror: The Comprehensive R Archive Network.
Choose the system version Select the corresponding version based on your operating system:
- Download R for Linux (Debian, Fedora/Redhat, Ubuntu)
- Download R for macOS
- Download R for Windows
For Windows users, click Download R for Windows, enter the base folder, and click Download R-4.4.2 for Windows.
Run the installer Double-click the downloaded
R-4.4.2-win.exeinstaller to start the setup wizard. Choose Simplified Chinese and click OK.Choose the installation directory You can choose the default directory or a custom installation location. I recommend avoiding paths that contain Chinese characters or spaces. Then click Next.
Select components Check the components you need and keep clicking Next.
Note: I recommend unchecking “Message translation” so that it is easier to look up error causes during later debugging.
Customize startup options I recommend keeping the default settings. The following explains the “Yes (customized startup)” option:
- Window display mode: Choose large-window or multi-window display mode.
- Help text display: Choose plain text or HTML webpage format.
- Shortcuts and startup options: Whether to create desktop or Start Menu shortcuts. I recommend leaving them unchecked because code is mainly run through RStudio.
- Environment variable configuration: The installer usually configures environment variables automatically, and most users do not need to adjust them. If manual configuration is needed, follow these steps:
- Win11: Press the
Winkey, search for “environment variables,” click “Environment Variables(N),” findPathunder “System variables(S),” double-click it, click “New,” and enter the R.exe path, for example:D:\R\R-4.4.2\bin. - Win10: Right-click “This PC,” choose “Properties,” click “Advanced system settings,” find
Pathunder “System variables(S),” double-click it, click “New,” and enter the R.exe path, for example:D:\R\R-4.4.2\bin.
- Win11: Press the
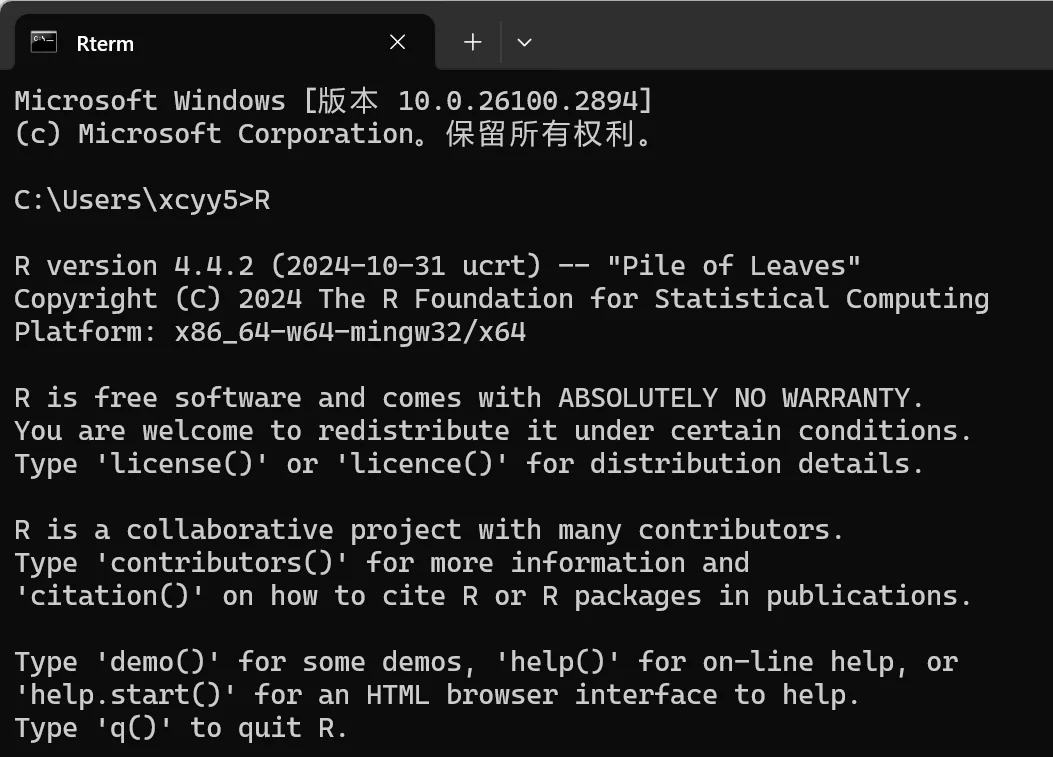
You can press
Win + Rto open Command Prompt (cmd), enterR, and if a long block of information appears, the environment variable has been configured successfully.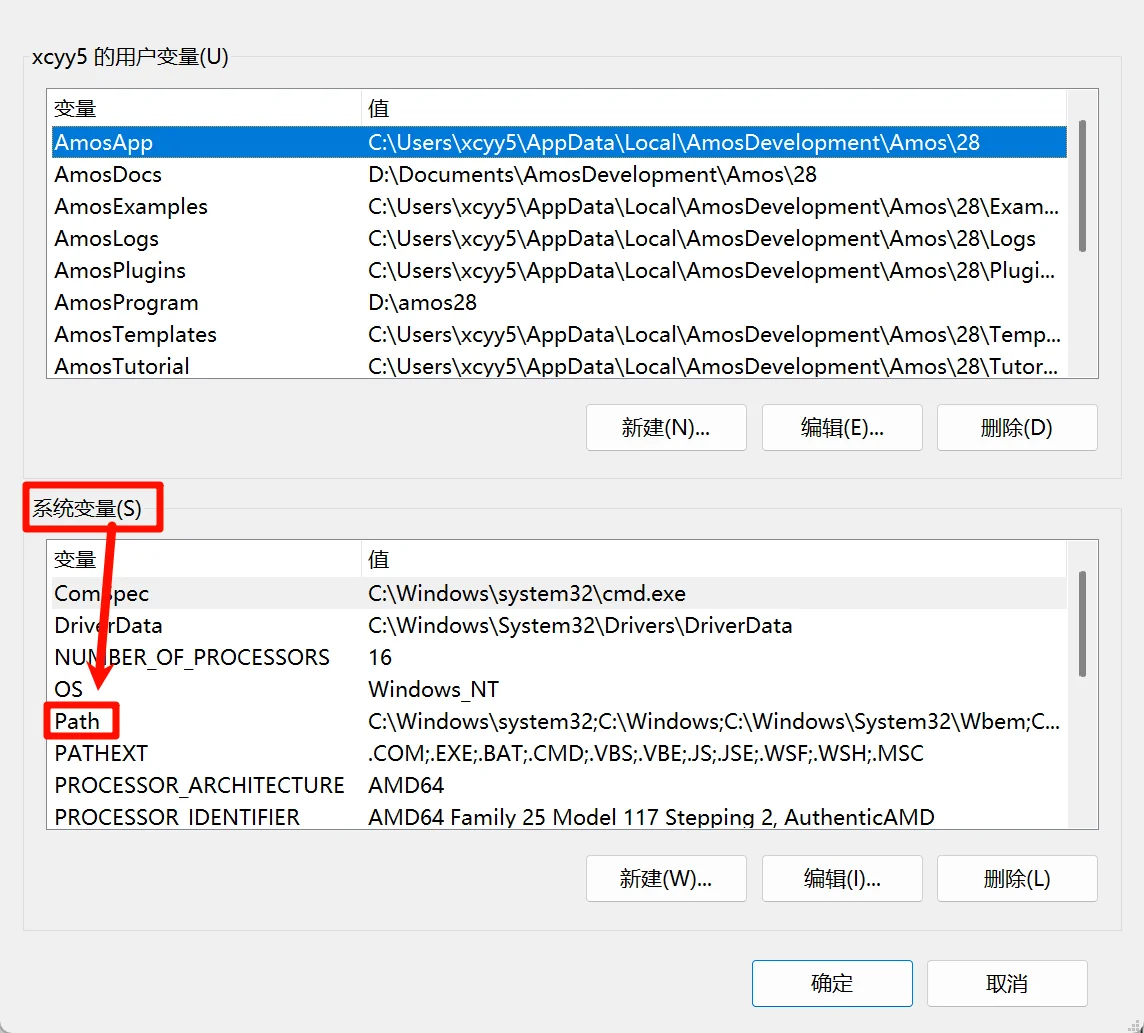
Install RTools
- Only Windows systems need RTools.
- After installation is complete, you can choose whether to launch R, then click “Finish” to exit the setup wizard.
- Next, return to step 2 and revisit the Tsinghua University mirror: The Comprehensive R Archive Network. Click in order: Download R for Windows > Rtools > choose the RTools version corresponding to the major version of R you installed. For example, if your R version is 4.4.2, choose RTools 4.4 and download Rtools 4.4 installer.
- Install RTools in the same directory as R, for example:
D:\R.
Downloading and Installing RStudio#
Download RStudio Visit RStudio Desktop - Posit and scroll down to find the RStudio installer for your operating system.
Install RStudio Double-click the downloaded installer and follow the prompts to complete installation. No extra configuration is needed during installation. I recommend keeping the default settings and making sure the installation location matches the R installation path, for example:
D:\R.Launch RStudio and link the R environment After installation, launch RStudio and click OK. RStudio will automatically detect the installed R environment on the system. If it does not detect it automatically, set it manually as follows:
- Go to
Tools->Global Options->General. - Specify the R installation path manually in the “R version” field.
- Go to
Change the mirror source for third-party libraries In RStudio, click
Tools->Global Options->Packages, then click Change beside “Primary CRAN repository:” and choose a domestic mirror source.